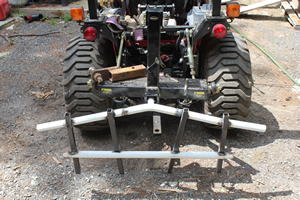
Summary
Originally Published: 2020-07-02
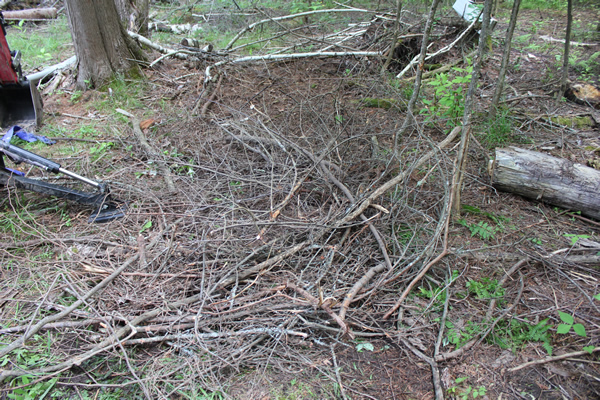
The problem I have wanted to solve for a long time is raking branches off the ground. When a tree is cut down the branches need to be cut off prior to moving the tree trunk. This means branches are scattered everywhere! Moving them means walking through poison ivy, stepping on them and getting scratched. Ideally I could just drag them to the path in bulk and put them in the wood chipper. Here is an example of branches just mashed together off the path.
Building a Rake for the Tractor
While there are many styles of rakes for tractors, they tend to be pricy and have special purposes, some would be overkill for my needs, some not enough. So I decided to try my hand at building one with old metal I have hanging around.
Disclaimer
Just to be upfront I have only welded a couple of things in my life and they were simple repairs. I purchased a welding kit for $299 and it had everything, I paid a guy $40 to give me an hour lesson to make sure I was doing it safely and from there I’ve probably spent about 2 hours welding since then. So if you look at my welds, they aren’t the greatest but so far the greatest or prettiest but so far the stuff has stayed together. This project is definitely the first I’ve made something.
Tools Used
The materials used include old pool metal rods that supported a soft sided pool. I also used a blind I found at the dump. Additionally I bought 8 metal nuts and bolts. I used my welder and my hand metal cutter as the primary tools. All in all, the pool metal and the blind metal were free (picked from dump) and the 8 metal screws were about $6. Other than time this project cost me $6.00! So it may not be pretty but it will do the job.
The Build Steps
Step One: Take the pools metal rods, connect them and measure them to be cut.
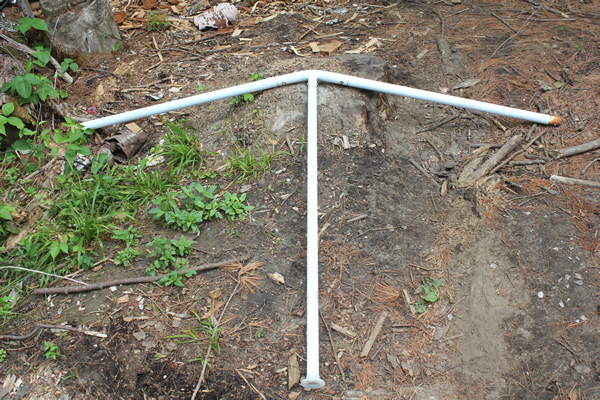
Step Two: Cut the metal to the needed length and sand the joints preparing to weld.hitch
Step Three: Weld the parts together. Drill a hole that will line up with the tractor’s three point hitch. NOTE: Ideally this would be done with a two inch steel so it fits into the trailer hitch properly. I just used the poles.
Step Four: Test fit the pin in the tractor’s 3 Point hitch
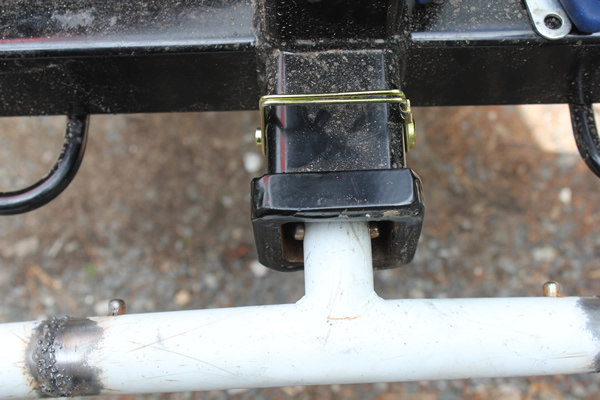
Step Five: The blinds found at the junk yard will be cut to pipes that will be the appropriate length for the rake.
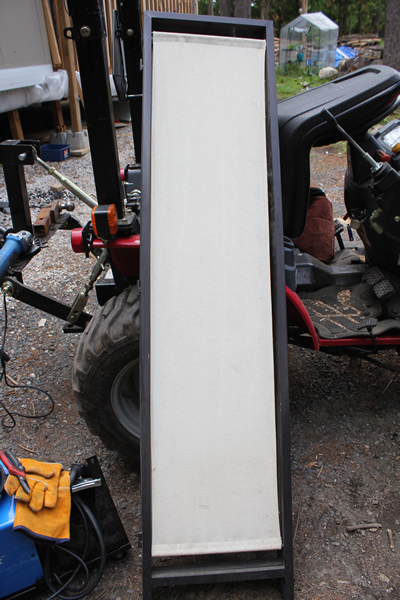
Step Six: Add the four metal crossbars to the frames and add bolts and nuts by drilling (not shown).
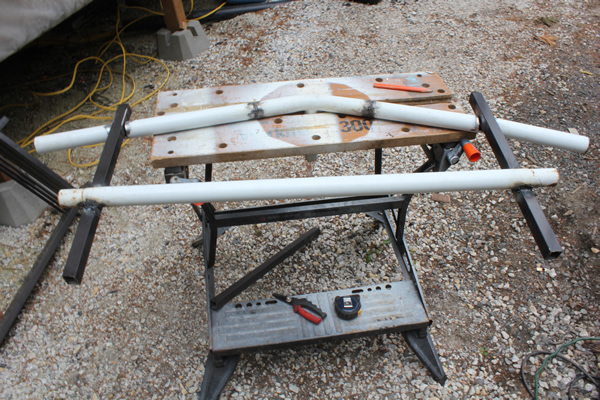
Step Seven: Final test fitting.
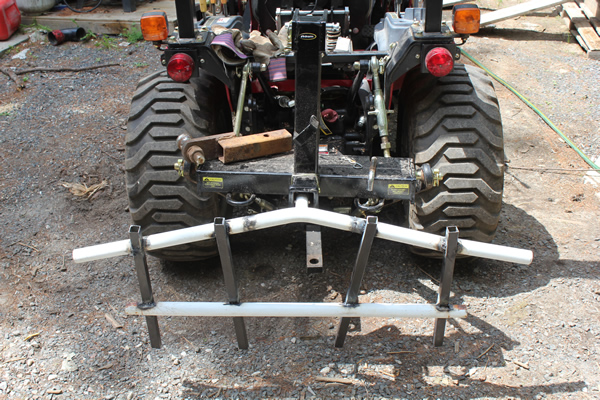
The bolts and nuts were added after the picture was taken and I believed they needed more support than my welds would hold (again see my disclaimer about experience).
Now for some real testing!
Ok the build is done. As per the picture at the top of the page I want to move the stacks of branches to the path for shredding in the wood chipper. The two images below show it pulling branches and the last one shows a pulled pile. If you compare the top and the last picture you will see an area with just brown needles that is where the branches were.
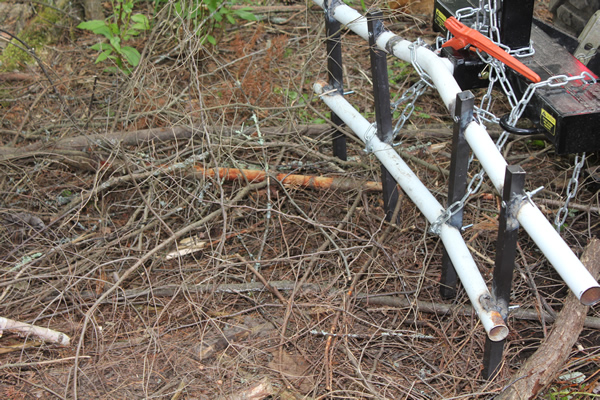
Improvement
The chains helped the bottom part stop from going backwards. I will be adding a bracket to the bottom rod and attaching it to bottom tow bar of the tractor. This will stop the rake from being pulled backward. It will also be easier than using chains but nonetheless the chains will work.
And finally here is a pulled stack of branches to the path. The other half still needs to be pulled but life will be easier!
All in all I will call this one a success and many needed skills learned. My welding got better, the cost was next to nothing and as I sit here with a case of poison ivy I think that this case may be the last one. Cheers.
